Enable HTTPS with Amazon Web Services Certificate Manager, CloudFront, and S3
NOTE: I first posted this in 2016. The process has changed.
Setting up HTTPS used to be a difficult and expensive process. You had to buy a certificate, generate keys for your server, run some Terminal commands and hope that you did it all correctly. Although eertificates have become vastly more affordable in recent years, they're still tricky to implement correctly.
In the last few months, however, two services have launched with the goal of making HTTPS easy: Let's Encrypt and AWS Certificate Manager. Both providers offer free, renewable SSL/TLS certificates. However, AWS Certificate Manager is only available to AWS customers using Elastic Load Balancing or CloudFront. That's what we'll look at in this piece.
Why HTTPS?
HTTPS encrypts data in transit between a server and a browser. Encrypting data in transit makes it significantly harder for bad actors on the network to view or tamper with what's being sent over the network. Although critical for protecting credit card numbers or user credentials, HTTPS is also a smart move for content sites that want to offer their users some protection from content injected by 3rd-parties.
Prep work
Before you request a certificate, you'll need to do some preparation.
1. Add an email address
Amazon will verify that you have control over the domain by sending a message to the email address associated with the domain, and to all of the following addresses.
- webmaster@yourdomain
- administrator@yourdomain
- admin@yourdomain
- yourdomain@contactprivacy.com
- postmaster@yourdomain
- hostmaster@yourdomain
Of course, yourdomain should be replaced with your actual domain. If you're requesting a certificate for a subdomain, you'll need to set up an email addresses for that subdomain (e.g.: webmaster@blog.example.com). You only need to set up one of them. This address can also be an alias instead of a separate mailbox.
2. Update your asset URLs
Ensure that your linked assets — JavaScript, CSS, and image files — are using relative URLs or (ideally) begin with https://. When using HTTPS, all linked assets must also be served over HTTPS to prevent data leakage. Remember, the point of HTTPS is to reduce the likelihood of snooping and tampering while the data is in transit.
Also update the src attributes for iframe elements. Modern browsers block HTTP iframe requests from HTTPS documents.
Don't forget to update requests to third-party ad scripts and content.
3. Fix your form end points
Any form on your site that submits to a third-party endpoint must also use https://. Third-party endpoints, include things like newsletter sign-up forms, hosted contact forms, and site-specific search forms like those provided by DuckDuckGo and Google. In my case, I needed to update the sign-up form HTML provided by MailChimp.
If one of your endpoint providers doesn't support HTTPS, get a new provider.
Failing to take steps 2, 3, and 4 will create mixed-content errors for each URL. Mixing HTTP content and assets with an HTTPS connection provides an opportunity for snooping and tampering. To protect users, newer browsers won't even load HTTP content embedded in or linked from an HTTPS page.
Once the above steps are complete, you're ready to request a certificate.
Request a certificate
- Log into your AWS Management Console. You'll find Certificate Manager under the Security & Identity section.
- Click Request a certificate.
- Enter your domain name or subdomain name. If you'd like your domain to be available at
https://example.comandhttps://www.example.com, add both domains to this certificate. - Confirm and continue.
- Check your email — it may take several minutes — and approve the certificate request.
Certificates will be renewed automatically each year.
Create a CloudFront distribution
Go back to the AWS console home page and go to CloudFront under Storage & Delivery.
- Create a Web Distribution.
- For the Origin Name, select your S3 bucket.
- Select Redirect HTTP to HTTPS (unless you'd like to retain HTTP access; I don't recommend this).
- Select your Allowed HTTP methods. For most static sites, allowing the
GET,HEAD, and/orOPTIONSmethods should be sufficient. - Under Distribution Settings → Alternate Domain Names, add your domain names and/or sub domain names (e.g.
example.com,www.example.com). These should match the domain names for which you've requested a certificate. - Select the Custom SSL Certificate option, choosing the certificate for your domain that you've already created and approved.
- Specify a Default Root Object, the name of the document that you'd like returned when the user visits your domain root, typically
index.htmlorhome.html.
Select values for other options as you see fit.
Keep in mind that you do not have to use an S3 bucket to serve assets with CloudFront. You can point a CloudFront distribution at any origin server. However, doing so also requires adding TLS support to that server.
Point your domain at your CloudFront distribution
Log into your DNS management service. This may be your domain registrar, your web host, or a service such as Amazon's Route 53 or EasyDNS. Create an alias for your domain or subdomain name that points to your CloudFront distribution.
What if I already have an S3 web site endpoint?
It's safe to disable your end point once your URL points to your CloudFront distribution. Unfortunately, S3 does not support HTTPS for website endpoints despite supporting HTTPS for bucket assets.
If you've done everything correctly, you should a padlock icon. In Chrome (below), the icon is green, and the protocol portion of the URL is displayed.

Firefox (below) also uses a green padlock icon and displays the protocol.

Internet Explorer (below) displays a plain padlock icon in the right corner of the address bar.

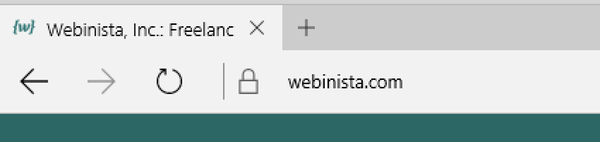
Microsoft Edge (below) displays a padlock in the left corner.
Safari displays a padlock to the left of the URL.

Also check your browser console. If a URL has mixed-content errors, they'll be reported there. Services such as JitBit's SSL Check will crawl your HTTPS site for HTTP content. Whether to trust such services is your call.